
|

|

|

|

|

|

|

|

|

|

|

|

|

|

|

|

|

|

|

|

|

|

|

|

|

|

|

|

|

|

|

|

|

|

|

|

|

|

|

|

|

|

|

|

|

|

|

|

|

|

|

|

|

|

|

|

|

|

|

|

|

|

|

|

|

|

|

|

|

|

|

|

|

|

|

|

|

|

|

|

|

|

|

|

|

|

|

|

|

|

|

|

|

|

|

|

|

|

|

|

|

|

|

|

|

|

|

|

|

|

|

|

|

|

|

|

|

|

|

|

|

|

|

|

|

|

|

|

|

|

|

|

|

|

|

|

|

|

|

|

|

|

|

|

|

|

|

|

|

|

|

|

|

|

|

|

|

|

|

|

|

|

|

|

|

|

|

|

|

|

|

|

|

|

|

|

|

|

|

|
Navigation
Wiki Links
No edit summary |
|||
| Line 2: | Line 2: | ||
The '''Entrance Zone''' (EZ) is one of four zones in [[Locations|Site-02]]. It contains the only exits out of the facility and due to this, it is crucial for non-SCPs to keep control of it. Unlike [[Light Containment Zone]], Entrance Zone only contains one checkpoint, which leads to [[Heavy Containment Zone]]. | The '''Entrance Zone''' (EZ) is one of four zones in [[Locations|Site-02]]. It contains the only exits out of the facility and due to this, it is crucial for non-SCPs to keep control of it. Unlike [[Light Containment Zone]], Entrance Zone only contains one checkpoint, which leads to [[Heavy Containment Zone]]. | ||
Entrance Zone contains | Entrance Zone contains multiple [[Workstation|Workstations]] and three possible [[Standard Locker|Standard Lockers]] spawn locations, two of which are in the same room. Entrance Zone is also home to Gate-A and Gate-B which lead to the [[Surface Zone]]. | ||
It is the spawn location of [[Facility Guard]]s at the start of the game. | It is the spawn location of [[Facility Guard]]s at the start of the game. | ||
| Line 11: | Line 11: | ||
==Walkway Office== | ==Walkway Office== | ||
[[File: | [[File:WalkwayOverview.png|400px|right|thumb|Overview of the room]] | ||
The '''Walkway Office''' is a medium sized room that contains a walkway and stairs. The top of these stairs has a chance for a [[Standard Locker]] to spawn. A [[Workstation]] will also always spawn at the top of the stairs. The elevated place is commonly used by SCPs to jump down from to ambush human players as they enter the room. | The '''Walkway Office''' is a medium sized room that contains a walkway and stairs. The top of these stairs has a chance for a [[Standard Locker]] to spawn. A [[Workstation]] will also always spawn at the top of the stairs. The elevated place is commonly used by SCPs to jump down from to ambush human players as they enter the room. | ||
Another Locker may also spawn one the lower floor of the office near one of the doors to the office. | Another Locker may also spawn one the lower floor of the office near one of the doors to the office. | ||
'''Possible | '''Possible Spawns:''' | ||
*Standard Locker | *Standard Locker | ||
** [[Adrenaline]] | ** [[Adrenaline]] | ||
** [[Flashlight]] | ** [[Flashlight]] | ||
** [[Keycard|Janitor Keycard]] | |||
** [[Keycard|Scientist Keycard]] | ** [[Keycard|Scientist Keycard]] | ||
** [[Keycard|Zone Manager Keycard]] | ** [[Keycard|Zone Manager Keycard]] | ||
| Line 32: | Line 29: | ||
==Cubical Office== | ==Cubical Office== | ||
[[File: | [[File:EZCubical.png|400px|right|thumb|An overview of the room]] | ||
[[File: | [[File:EZCubicalInside.png|400px|right|thumb|The Cubical located in the corner of the room. A locker will sometimes spawn here.]] | ||
The '''Cubical Office''' is a medium sized office that contains multiple desk with computers on them. <br> | The '''Cubical Office''' is a medium sized office that contains multiple desk with computers on them. <br> | ||
Near the corner of the room contains a cubical, a common hiding spot that may also contain a lootable [[Standard Locker]]. | Near the corner of the room contains a cubical, a common hiding spot that may also contain a lootable [[Standard Locker]]. | ||
'''Possible | '''Possible Spawns:''' | ||
*Standard Locker | *[[Standard Locker]] | ||
** [[Adrenaline]] | ** [[Adrenaline]] | ||
** [[Flashlight]] | ** [[Flashlight]] | ||
** [[Keycard|Janitor Keycard]] | |||
** [[Keycard|Scientist Keycard]] | ** [[Keycard|Scientist Keycard]] | ||
** [[Keycard|Zone Manager Keycard]] | ** [[Keycard|Zone Manager Keycard]] | ||
** [[First Aid Kit]] | ** [[First Aid Kit]] | ||
** [[Painkillers]] | ** [[Painkillers]] | ||
*[[Workstation]] | |||
| Line 53: | Line 48: | ||
==Side Office== | ==Side Office== | ||
[[File: | [[File:EZStraightLower.png|400px|right|thumb|Overview of the room]] | ||
The '''Side Office''' is a hallway with a small office on the side below floor level. The dividing wall of the sunken office can be used for cover and hiding. | The '''Side Office''' is a hallway with a small office on the side below floor level. The dividing wall of the sunken office can be used for cover and hiding. | ||
| Line 60: | Line 55: | ||
==Conference Hallway== | ==Conference Hallway== | ||
[[File: | [[File:EZConfrence.png|400px|right|thumb|Overview of the room]] | ||
The '''Conference Hallway''' is a hallway with two locked doors. One is labeled as ''Conference Room 9B'' while the other is labeled as ''Dr. L''. The spot near the ''Dr. L'' door is often used as a hiding place or to avoid gunfire. | The '''Conference Hallway''' is a hallway with two locked doors. One is labeled as ''Conference Room 9B'' while the other is labeled as ''Dr. L''. The spot near the ''Dr. L'' door is often used as a hiding place or to avoid gunfire. | ||
<br clear=all> | <br clear=all> | ||
==Intercom Room== | ==Intercom Room== | ||
[[File: | [[File:IntercomOverview.png|400px|right|thumb|Entrance to the Intercom]] | ||
[[File: | [[File:IntercomInside.png|400px|right|thumb|Inside of the room]] | ||
[[File:IntercomSpam.png|400px|right|thumb|The Intercom]] | |||
{{DoorStats| | {{DoorStats| | ||
|ReqAccess=IA | |ReqAccess=IA | ||
| Line 79: | Line 75: | ||
==Gates== | ==Gates== | ||
[[File: | [[File:Gate-A.png|400px|right|thumb|Gate A]] | ||
[[File: | [[File:Gate-B.png|400px|right|thumb|Gate B]] | ||
{{DoorStats| | {{DoorStats| | ||
|ReqAccess=GA | |ReqAccess=GA | ||
| Line 100: | Line 96: | ||
==Evacuation Shelter== | ==Evacuation Shelter== | ||
[[File: | [[File:EvacShelterDoor.png|400px|right|thumb|The Evacuation Shelter]] | ||
The '''Evacuation Shelter''' is a small room that looks similar to a gate. | [[File:EvacShelterInside.png|400px|right|thumb|Inside]] | ||
The '''Evacuation Shelter''' is a small room that looks similar to a gate. The gate itself is badly damaged and an redish-orange gas is seen leaking out. Peeking into the room, the player can see many dead bodies.<br> | |||
A [[Workstation]] can be found to the left of the entrance.<br> | A [[Workstation]] can be found to the left of the entrance.<br> | ||
The room is sometimes used as a place to hide. | The room is sometimes used as a place to hide. | ||
| Line 113: | Line 110: | ||
<br clear=all> | <br clear=all> | ||
==Straight Hallway== | ==Straight Hallway== | ||
[[File: | [[File:EZStraight.png|400px|right|thumb|Straight hallway]] | ||
A simple straight hallway with a decorative bench along the side. The HCZ/EZ Checkpoint is always followed by two Straight Hallways no matter the layout. | A simple straight hallway with a decorative bench along the side. The HCZ/EZ Checkpoint is always followed by two Straight Hallways no matter the layout. | ||
<br clear=all> | <br clear=all> | ||
==Corner Hallway== | ==Corner Hallway== | ||
[[File: | [[File:EZCorner.png|400px|right|thumb|C shaped hallway]] | ||
A simple corner hallway with a decorative bench near the corner. The corner can be used to hide from SCPs or other dangerous foes. | A simple corner hallway with a decorative bench near the corner. The corner can be used to hide from SCPs or other dangerous foes. | ||
<br clear=all> | <br clear=all> | ||
==3-Way Intersections== | |||
[[File:EZ3Way.png|400px|right|thumb|T Shaped hallway]] | |||
A 3-Way Intersection with benches. | |||
<br clear=all> | |||
==4-Way Intersection== | ==4-Way Intersection== | ||
[[File: | [[File:EntranceCAT.png|400px|right|thumb|X shaped hallway]] | ||
A 4-Way Intersection with a decorative bench near one of the doors. | A 4-Way Intersection with a decorative bench near one of the doors. | ||
<br clear=all> | <br clear=all> | ||
==Dead End== | ==Dead End== | ||
[[File: | [[File:EZDeadEnd1.png|400px|right|thumb|Variation 1]] | ||
[[File: | [[File:EZDeadEnd2.png|400px|right|thumb|Variation 2]] | ||
'''Dead Ends''' are red rooms with only one entrance. There are two variations of dead ends. <br> | '''Dead Ends''' are red rooms with only one entrance. There are two variations of dead ends. <br> | ||
A small version that has a collapsed ceiling, stopping one from passing. This room is a common hiding spot. <br> | A small version that has a collapsed ceiling, stopping one from passing. This room is a common hiding spot. <br> | ||
| Line 135: | Line 138: | ||
==Impossible Rooms== | ==Impossible Rooms== | ||
[[File:EntranceZoneHarp.png| | [[File:EntranceZoneHarp.png|400px|right|thumb|Hallway with offices that are locked]] | ||
[[File:EntranceZoneCaution.png| | [[File:EntranceZoneCaution.png|400px|right|thumb|Hallway with a locked door]] | ||
'''Impossible Rooms''' are rooms to do not naturally generate under normal ingame conditions despite existing | '''Impossible Rooms''' are rooms to do not naturally generate under normal ingame conditions despite existing within the generation code. Both of these two Impossible Hallways are similar in layout to the Conference Hallway. | ||
<br clear=all> | <br clear=all> | ||
| Line 143: | Line 146: | ||
There are five possible map layouts of Entrance Zone. Special Rooms are randomized in these layouts.<br> | There are five possible map layouts of Entrance Zone. Special Rooms are randomized in these layouts.<br> | ||
The Straight Hallway on the far left is always the Checkpoint. <br> | The Straight Hallway on the far left is always the Checkpoint. <br> | ||
Below are all the possible map layouts, using | Below are all the possible map layouts, using their official names. | ||
<tabber> | <tabber> | ||
3-Lane= | |||
<center> | <center> | ||
{{MapLayouts | {{MapLayouts | ||
| | | | | | | | | | | | | | | | | | | | | | | | ||
|21= | | | | | | | | | | |21= | | | | | | | |ERS| | |ERS| | | | | | | | | | ||
|41= | | | | | | | | |41= | | | | | | |CSE|TRN|SRW|SRW|TRW| | | | | | | | | | ||
|61= | | | | | | | | |61= | | | | | | |SRN|CSE|SRW|SRW|4RW|ERW| | | | | | | | | ||
|81= | | | | | |81= | | | |SRW|SRW|SRW|4RW|CNW| | |SRN| | | | | | | | | | ||
|101= | | | | | | |101= | | | | | | |CNE|TRS|SRW|TRS|TRN|ERW| | | | | | | | | ||
|121= | | | | | | | | |ERN | |121= | | | | | | | |ERN| |ERN| | | | | | | | | | | ||
|141= | | | | | | | | | | | | | | | | | | | | | |141= | | | | | | | | | | | | | | | | | | | | | ||
|161= | | | | | | | | | | | | | | | | | | | | | |161= | | | | | | | | | | | | | | | | | | | | | ||
}} | }} | ||
|-| | |-| | ||
Loop= | |||
<center> | <center> | ||
{{MapLayouts | {{MapLayouts | ||
| | | | | | | | | | | | | | | | | | | | | | | | ||
|21= | |21= | | | | | | | | |ERS| | |ERS| | | | | | | | | ||
|41= | | | | | | | | |41= | | | | | | |CSE|SRW|4RW|SRW|TRS|CNW| | | | | | | | | ||
|61= | | | | | | | | | |61= | | | | | | |SRN| |ERN| |SRN| | | | | | | | | | ||
|81= | | | | | |81= | | | |SRW|SRW|SRW|4RW|CSW| |CSE|TRN|ERW| | | | | | | | | ||
|101= | | | | | | |101= | | | | | | |ERN|CNE|TRS|CNW| | | | | | | | | | | ||
|121= | | | | | | | |ERN | |121= | | | | | | | | |ERN| | | | | | | | | | | | ||
|141= | | | | | | | | | | | | | | | | | | | | | |141= | | | | | | | | | | | | | | | | | | | | | ||
|161= | | | | | | | | | | | | | | | | | | | | | |161= | | | | | | | | | | | | | | | | | | | | | ||
}} | }} | ||
|-| | |-| | ||
Parallel= | |||
<center> | <center> | ||
{{MapLayouts | {{MapLayouts | ||
| | | | | | | | | | | | | | | | | | | | | | | | ||
|21= | | | | | | | | | |21= | | | | | | | |ERS| |ERS| | | | | | | | | | | ||
|41= | | | | | | | | |41= | | | | | | |CSE|TRN|SRW|TRW| | | | | | | | | | | ||
|61= | | | | | |61= | | | |SRW|SRW|SRW|4RW|SRW|SRW|4RW|ERW| | | | | | | | | | ||
|81= | | | | | | | | |81= | | | | | | |SRN|CSE|SRW|TRW| | | | | | | | | | | ||
|101= | | | | | | |101= | | | | | | |CNE|4RW|SRW|TRW| | | | | | | | | | | ||
|121= | | | | | | | |ERN| | |121= | | | | | | | |ERN| |ERN| | | | | | | | | | | ||
|141= | | | | | | | | | | |141= | | | | | | | | | | | | | | | | | | | | | ||
|161= | | | | | | | | | | | | | | | | | | | | | |161= | | | | | | | | | | | | | | | | | | | | | ||
}} | }} | ||
|-| | |-| | ||
Lima= | |||
<center> | <center> | ||
{{MapLayouts | {{MapLayouts | ||
| | | | | | | | | | | | | | | | | | |ERS| | | | | | | | | | | | | ||
|21= | | | | | | | | |21= | | | | | | |CSE|4RW|SRW|ERW| | | | | | | | | | | ||
|41= | | | | | | | | |41= | | | | | | |SRN|SRN| | | | | | | | | | | | | ||
|61= | | | | | |61= | | | |SRW|SRW|SRW|4RW|TRW|ERS| | | | | | | | | | | | ||
|81= | | | | | | | | |81= | | | | | | |SRN|CNE|4RW|ERW| | | | | | | | | | | ||
|101= | | | | | | |101= | | | | | | |TRE|SRW|TRW| | | | | | | | | | | | ||
|121= | | | | | | | |ERN| | | |121= | | | | | | |ERN| |ERN| | | | | | | | | | | | ||
|141= | | | | | | | | | | | | | | | | | | | | | |141= | | | | | | | | | | | | | | | | | | | | | ||
|161= | | | | | | | | | | | | | | | | | | | | | |161= | | | | | | | | | | | | | | | | | | | | | ||
}} | }} | ||
|-| | |-| | ||
Ring= | |||
<center> | <center> | ||
{{MapLayouts | {{MapLayouts | ||
| | | | | | | | | | | | | | | | | | | | | | | | ||
|21= | |21= | | | | | | | | | | | | | | | | | | | | | ||
|41= | | | | | | | | | |41= | | | | | | |ERS| |ERS| | | | | | | | | | | | ||
|61= | | | | | | | | |61= | | | | | | |TRE|SRW|4RW|TRS|ERW| | | | | | | | | | ||
|81= | | | | | | | | | |81= | | | | | | |SRN| |SRN|SRN| | | | | | | | | | | ||
|101= | | | | | | |101= | | | | | | |SRN|CSE|TRN|4RW|ERW| | | | | | | | | | ||
|121= | | | | | |121= | | | |SRW|SRW|SRW|TRN|4RW|SRW|TRW| | | | | | | | | | | ||
|141= | | | | | | | | | |141= | | | | | | | |ERN| |ERN| | | | | | | | | | | ||
|161= | | | | | | | | | | | | | | | | | | | | | |161= | | | | | | | | | | | | | | | | | | | | | ||
}} | }} | ||
Revision as of 20:35, 8 October 2021
The Entrance Zone (EZ) is one of four zones in Site-02. It contains the only exits out of the facility and due to this, it is crucial for non-SCPs to keep control of it. Unlike Light Containment Zone, Entrance Zone only contains one checkpoint, which leads to Heavy Containment Zone.
Entrance Zone contains multiple Workstations and three possible Standard Lockers spawn locations, two of which are in the same room. Entrance Zone is also home to Gate-A and Gate-B which lead to the Surface Zone.
It is the spawn location of Facility Guards at the start of the game.
Unique Rooms
Unique rooms are rooms that spawn only once and might include valuable items or have an important gameplay role.
Walkway Office
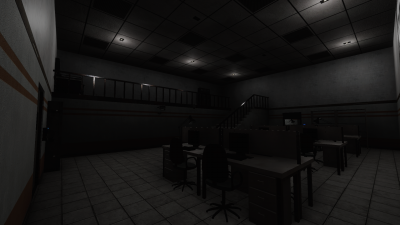
The Walkway Office is a medium sized room that contains a walkway and stairs. The top of these stairs has a chance for a Standard Locker to spawn. A Workstation will also always spawn at the top of the stairs. The elevated place is commonly used by SCPs to jump down from to ambush human players as they enter the room.
Another Locker may also spawn one the lower floor of the office near one of the doors to the office. Possible Spawns:
- Standard Locker
Cubical Office
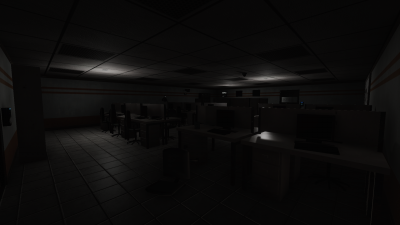
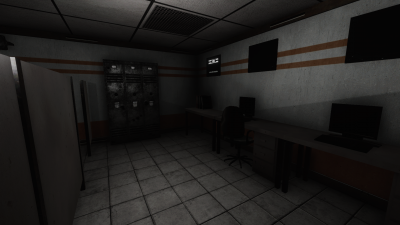
The Cubical Office is a medium sized office that contains multiple desk with computers on them.
Near the corner of the room contains a cubical, a common hiding spot that may also contain a lootable Standard Locker.
Possible Spawns:
Side Office
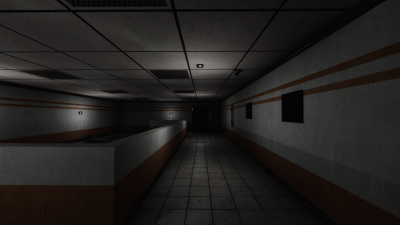
The Side Office is a hallway with a small office on the side below floor level. The dividing wall of the sunken office can be used for cover and hiding.
Conference Hallway
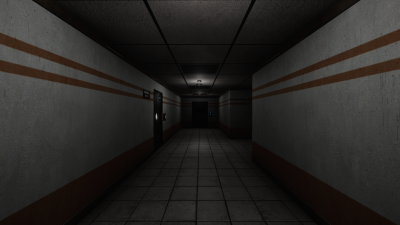
The Conference Hallway is a hallway with two locked doors. One is labeled as Conference Room 9B while the other is labeled as Dr. L. The spot near the Dr. L door is often used as a hiding place or to avoid gunfire.
Intercom Room
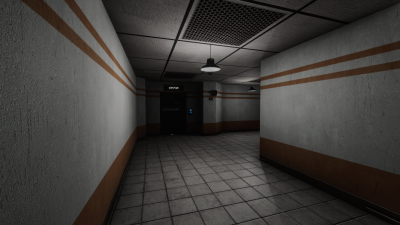
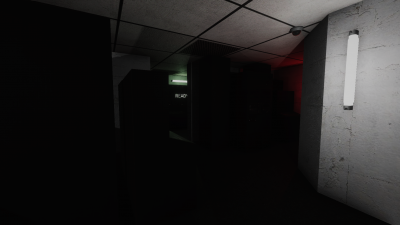
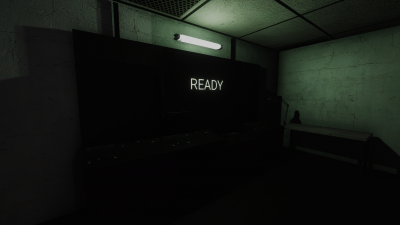
| Intercom Access Required | |
| SCP-079 AP Cost: 30 AP | |
| Door can be destroyed with explosives, SCP-018 and SCP-096 |
The Intercom Room is a corner room with a keycard locked door that requires
Intercom Access Intercom Accessto open. The door leads to the intercom that players can use to broadcast "useful" messages to the whole facility. The duration of and cooldown between broadcasts can be changed in the server config - by default, players have up to 20 seconds to send broadcasts followed by a 120 second cooldown. The intercom can be used as a room of hiding as only a small amount of Keycards can open the door.
Gates


| Gate Access Required | |
| SCP-079 AP Cost: 80 AP | |
| Door can't be destroyed by any means |
Entrance Zone is home to two gates that lead to the Surface Zone.
Gate A is closer to the Chaos Insurgent spawn area and so is often used by Chaos when they enter Site-02.
Whilst Gate B is closer to the Mobile Task Force spawn area, and so is often used by the MTF when they enter Site-02. It is also closer to the Escape Area on Surface Zone, making Gate-B often used by Class-Ds and Scientists.
Both gates contain one Workstation.
The gates can only be opened by keycard with Gate Access Gate Access.
Evacuation Shelter
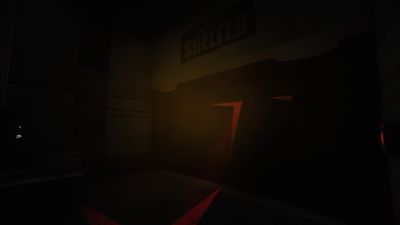
The Evacuation Shelter is a small room that looks similar to a gate. The gate itself is badly damaged and an redish-orange gas is seen leaking out. Peeking into the room, the player can see many dead bodies.
A Workstation can be found to the left of the entrance.
The room is sometimes used as a place to hide.
Hallways and Dead Ends
Hallways are repeating connectors in between unique rooms and other hallways, most of the time nothing of interest can be found in them.
Dead ends are a single door "rooms" that have no gameplay purpose but can be used as hiding spots.
Straight Hallway
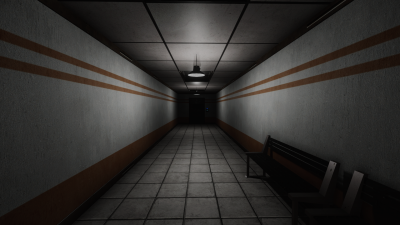
A simple straight hallway with a decorative bench along the side. The HCZ/EZ Checkpoint is always followed by two Straight Hallways no matter the layout.
Corner Hallway

A simple corner hallway with a decorative bench near the corner. The corner can be used to hide from SCPs or other dangerous foes.
3-Way Intersections
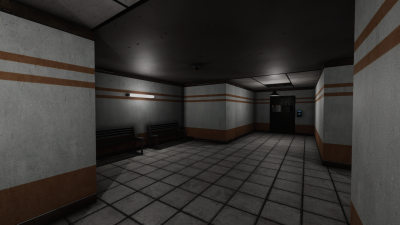
A 3-Way Intersection with benches.
4-Way Intersection
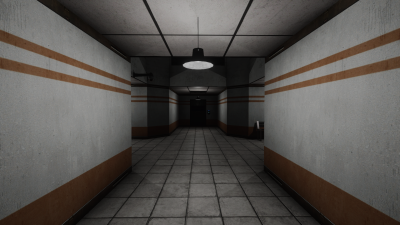
A 4-Way Intersection with a decorative bench near one of the doors.
Dead End
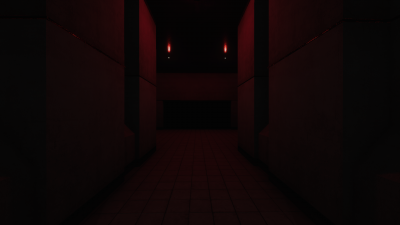
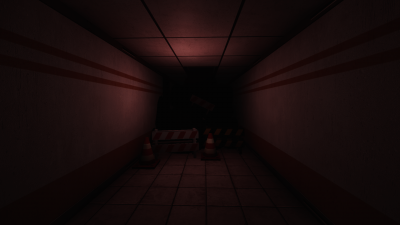
Dead Ends are red rooms with only one entrance. There are two variations of dead ends.
A small version that has a collapsed ceiling, stopping one from passing. This room is a common hiding spot.
A large dead end room that contains a gate that can't be interacted with, Facility Guards can spawn in this room. Like the other Dead End room, this room is also a common hiding place.
Impossible Rooms
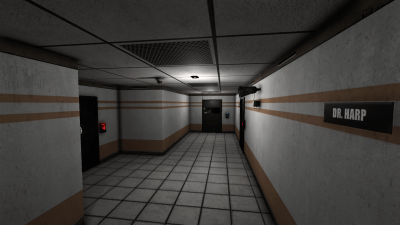
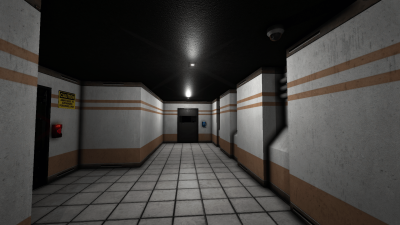
Impossible Rooms are rooms to do not naturally generate under normal ingame conditions despite existing within the generation code. Both of these two Impossible Hallways are similar in layout to the Conference Hallway.
Map Layouts
There are five possible map layouts of Entrance Zone. Special Rooms are randomized in these layouts.
The Straight Hallway on the far left is always the Checkpoint.
Below are all the possible map layouts, using their official names.
Trivia
- Entrance Zone is the only zone that does not have a theme.
| ||||||||||||||||||||||
- This page was last edited on 8 October 2021, at 20:35.
- Content is available under CC BY-SA 3.0 unless otherwise noted.
- Privacy policy
- About SCP: Secret Laboratory English Official Wiki
- Disclaimers


