m (Jamintheinfinite moved page Locker to Standard Locker) |
Otduepas06 (talk | contribs) (So do these minimum/maximum number of spawns per round include the ones labeled as always or not?) |
||
| (37 intermediate revisions by 8 users not shown) | |||
| Line 1: | Line 1: | ||
{{Structure infobox | {{Structure infobox | ||
|image = | |image = Standard_Lockah.png | ||
|image_size = | |image_size = 350 | ||
|spawn = | |spawn = [[Light Containment Zone]]<br>[[Heavy Containment Zone]]<br>[[Entrance Zone]] | ||
}} | }} | ||
The '''Standard Locker''' is a type of [[Site-02|Structure]] found in ''SCP: Secret Laboratory''. | |||
=In Game= | =In Game= | ||
Standard Lockers are lockers that contain random loot and will randomly spawn in certain rooms around Site-02. Standard Lockers can be opened and closed by players by pressing the {{Key Press|E}} key. The items inside of a Standard Locker are random each round. <br> | |||
There are six spawn points inside the Standard Locker where items can spawn. Items will only spawn on the top and middle shelves at the bottom of the Standard Locker. A minimum of two will always have loot, with a maximum of five being filled. | |||
There will always be at least two Standard Lockers in a round. Up to six can spawn in a given round. | |||
'''Possible Loot:'''<br> | |||
{|border="1" style="border-collapse:collapse" | |||
!colspan="2" style="border-style: solid; border-width: 1px 2px 1px 1px;border-right:solid 2px white; text-align:center;padding: 5px;background-color:#333333;" |Item | |||
!style="text-align:center;padding: 5px;background-color:#333333;"|Max Chambers | |||
!style="text-align:center;padding: 5px;background-color:#333333;"|Chance | |||
|- | |||
|colspan="2" style="border-style: solid; border-width: 1px 0 1px 1px;border-right:solid 2px white;padding: 5px;background-color:#111111;"|{{ItemTable2|Scientist Keycard}} | |||
|style="padding: 5px;text-align:center;background-color:#111111;"|2 | |||
|style="padding: 5px;text-align:center;background-color:#111111;"|{{WeightedProbability|weight=2|totalWeight=16}} | |||
|- | |||
|colspan="2" style="border-style: solid; border-width: 1px 0 1px 1px;border-right:solid 2px white;padding: 5px;background-color:#111111;"|{{ItemTable2|Zone Manager Keycard}} | |||
|style="padding: 5px;text-align:center;background-color:#111111;"|2 | |||
|style="padding: 5px;text-align:center;background-color:#111111;"|{{WeightedProbability|weight=2|totalWeight=16}} | |||
|- | |||
|colspan="2" style="border-style: solid; border-width: 1px 0 1px 1px;border-right:solid 2px white;padding: 5px;background-color:#111111;"|{{ItemTable2|First Aid Kit}} | |||
|style="padding: 5px;text-align:center;background-color:#111111;"|1 | |||
|style="padding: 5px;text-align:center;background-color:#111111;"|{{WeightedProbability|weight=1|totalWeight=16}} | |||
|- | |||
|colspan="2" style="border-style: solid; border-width: 1px 0 1px 1px;border-right:solid 2px white;padding: 5px;background-color:#111111;"|{{ItemTable2|Flashlight}} | |||
|style="padding: 5px;text-align:center;background-color:#111111;"|2 | |||
|style="padding: 5px;text-align:center;background-color:#111111;"|{{WeightedProbability|weight=1|totalWeight=16}} | |||
|- | |||
|colspan="2" style="border-style: solid; border-width: 1px 0 1px 1px;border-right:solid 2px white;padding: 5px;background-color:#111111;"|{{ItemTable2|Janitor Keycard}} | |||
|style="padding: 5px;text-align:center;background-color:#111111;"|1 | |||
|style="padding: 5px;text-align:center;background-color:#111111;"|{{WeightedProbability|weight=1|totalWeight=16}} | |||
|- | |||
|colspan="2" style="border-style: solid; border-width: 1px 0 1px 1px;border-right:solid 2px white;padding: 5px;background-color:#111111; white-space: nowrap;"|<p>{{ItemTable2|Painkillers}}(x3)</p> | |||
|style="padding: 5px;text-align:center;background-color:#111111;"|2 | |||
|style="padding: 5px;text-align:center;background-color:#111111;"|{{WeightedProbability|weight=1|totalWeight=16}} | |||
|- | |||
|colspan="2" style="border-style: solid; border-width: 1px 0 1px 1px;border-right:solid 2px white;padding: 5px;background-color:#111111;"|<p>{{ItemTable2|Coin}}(x4)</p> | |||
|style="padding: 5px;text-align:center;background-color:#111111;"|1 | |||
|style="padding: 5px;text-align:center;background-color:#111111;"|{{WeightedProbability|totalWeight=16}} | |||
|- | |||
|colspan="2" style="border-style: solid; border-width: 1px 0 1px 1px;border-right:solid 2px white;padding: 5px;background-color:#111111;"|{{ItemTable2|Radio}} | |||
|style="padding: 5px;text-align:center;background-color:#111111;"|1 | |||
|style="padding: 5px;text-align:center;background-color:#111111;"|{{WeightedProbability|totalWeight=16}} | |||
|- | |||
|} | |||
<small> | |||
Max Chambers shows how many times the loot can spawn in a locker. There are six Chambers, so an item of "Max Chambers 2" can spawn up to two times throughout the locker. It does not mean how much of a item spawns in one chamber. <br> | |||
The bottom shelf will never contain Flashlights, Radios or Coins. | |||
</small> | |||
==Spawn Locations== | |||
===Guaranteed Spawn Locations=== | |||
<u> [[Heavy Containment Zone]] </u> | |||
* One will always spawn next to the breached cryo storage doorway of [[Heavy Containment Zone#SCP-939's Containment Area|SCP-939's Containment Area]]. | |||
* [[ | |||
===Possible Spawn Locations=== | |||
<u> [[Light Containment Zone]] </u> | |||
* One can spawn in the side room of the [[Light Containment Zone#Garden Chamber - VT|Garden Chamber]]. | |||
* One can spawn against the left side of [[Light Containment Zone#Office - PC15|PC15]]. | |||
* One can spawn on the right wall of the [[Light Containment Zone#Glass Room - GR 18|Glass Room]]. | |||
* One can spawn to the right of the door, outside of [[Light Containment Zone#Test Chamber 1 - TC01|Test Chamber 1]]. | |||
* One can spawn right next to the door to [[Light Containment Zone#SCP-173's Containment Chamber - PT00|SCP-173's Containment Chamber]]. | |||
<u> [[Entrance Zone]] </u> | |||
* Up to two can spawn by the top or bottom of the stairs in the [[Entrance Zone#Two-Story Office|Two-Story Office]]. | |||
* One can spawn within the cubical in the [[Entrance Zone#Large Office|Large Office]]. | |||
* [[ | |||
* [[ | |||
==Gallery== | ==Gallery== | ||
<gallery mode=" | <gallery mode="packed" widths=600px heights=338px> | ||
LCZPCStandardLocker.png| A Standard Locker found in PC15 | |||
HCZ939RoomStandardLockerClosed.png| A Standard Locker found in SCP-939's Containment Area | |||
HCZ939RoomStandardLockerOpened.png| An opened Standard Locker | |||
</gallery> | </gallery> | ||
==Trivia== | ==Trivia== | ||
* In earlier builds, Cabinets spawned instead of Lockers. These only spawned in Glass Room | * In earlier builds, Cabinets spawned instead of Standard Lockers. These only spawned in the Glass Room and Two-Story Office. Cabinets could be searched by holding E on them, after a bar filled up, an item was added to the player's inventory. Cabinets could only be looted once per round and only had one item. | ||
** The | ** The Cabinets in Entrance Zone had a very low chance to give a Facility Manager Keycard, allowing [[Mobile Task Force]] to recontain [[SCP-106]] or activate the [[Alpha Warhead]] early on in the game. | ||
***In even earlier builds, this allowed MTF to kill SCP-079 by opening his room and shooting him. | *** In even earlier builds, this allowed MTF to kill [[SCP-079]] by opening his room and shooting him. | ||
{{Locations Navbox}} | {{Locations Navbox}} | ||
Latest revision as of 23:03, 24 September 2023
| Standard Locker | |
|---|---|

| |
| Info | |
| Spawn | Light Containment Zone Heavy Containment Zone Entrance Zone |
The Standard Locker is a type of Structure found in SCP: Secret Laboratory.
In Game
Standard Lockers are lockers that contain random loot and will randomly spawn in certain rooms around Site-02. Standard Lockers can be opened and closed by players by pressing the E key. The items inside of a Standard Locker are random each round.
There are six spawn points inside the Standard Locker where items can spawn. Items will only spawn on the top and middle shelves at the bottom of the Standard Locker. A minimum of two will always have loot, with a maximum of five being filled.
There will always be at least two Standard Lockers in a round. Up to six can spawn in a given round.
Possible Loot:
| Item | Max Chambers | Chance | |
|---|---|---|---|
 Scientist Keycard Scientist Keycard
|
2 | 18.75% | |
 Zone Manager Keycard Zone Manager Keycard
|
2 | 18.75% | |
 First Aid Kit First Aid Kit
|
1 | 12.5% | |
 Flashlight Flashlight
|
2 | 12.5% | |
 Janitor Keycard Janitor Keycard
|
1 | 12.5% | |
|
2 | 12.5% | |
|
1 | 6.25% | |
 Radio Radio
|
1 | 6.25% | |


Max Chambers shows how many times the loot can spawn in a locker. There are six Chambers, so an item of "Max Chambers 2" can spawn up to two times throughout the locker. It does not mean how much of a item spawns in one chamber.
The bottom shelf will never contain Flashlights, Radios or Coins.
Spawn Locations
Guaranteed Spawn Locations
- One will always spawn next to the breached cryo storage doorway of SCP-939's Containment Area.
Possible Spawn Locations
- One can spawn in the side room of the Garden Chamber.
- One can spawn against the left side of PC15.
- One can spawn on the right wall of the Glass Room.
- One can spawn to the right of the door, outside of Test Chamber 1.
- One can spawn right next to the door to SCP-173's Containment Chamber.
- Up to two can spawn by the top or bottom of the stairs in the Two-Story Office.
- One can spawn within the cubical in the Large Office.
Gallery
-
A Standard Locker found in PC15
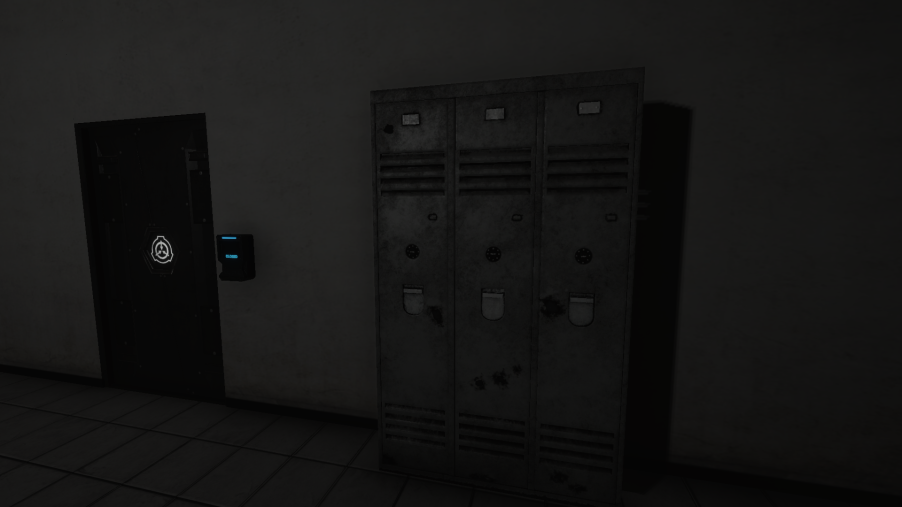
-

A Standard Locker found in SCP-939's Containment Area
-
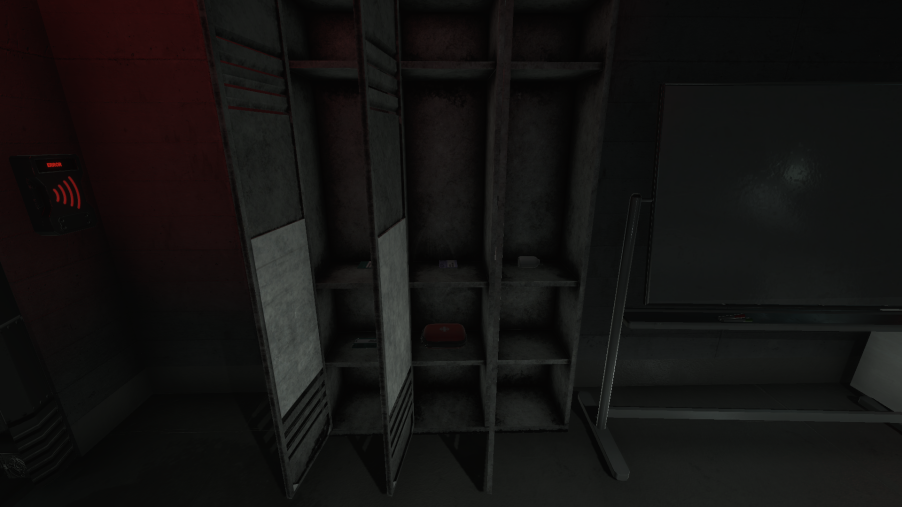
An opened Standard Locker


Trivia
- In earlier builds, Cabinets spawned instead of Standard Lockers. These only spawned in the Glass Room and Two-Story Office. Cabinets could be searched by holding E on them, after a bar filled up, an item was added to the player's inventory. Cabinets could only be looted once per round and only had one item.
- The Cabinets in Entrance Zone had a very low chance to give a Facility Manager Keycard, allowing Mobile Task Force to recontain SCP-106 or activate the Alpha Warhead early on in the game.
- In even earlier builds, this allowed MTF to kill SCP-079 by opening his room and shooting him.
- The Cabinets in Entrance Zone had a very low chance to give a Facility Manager Keycard, allowing Mobile Task Force to recontain SCP-106 or activate the Alpha Warhead early on in the game.
| ||||||||||||||||||||||