Navigation
Wiki Links
(Undo revision 7123 by Jamintheinfinite (talk)) Tag: Undo |
|||
| (48 intermediate revisions by 6 users not shown) | |||
| Line 1: | Line 1: | ||
{{Beta|Writting up new report}} | |||
<includeonly>{{CURRENTDAY}}</includeonly> | |||
The '''Heavy Containment Zone''' is one of four zones found in ''SCP: Secret Laboratory''. It is the location of the [[Micro H.I.D.]], as well as the three [[Emergency Power Stations]]. | |||
__TOC__ | __TOC__ | ||
==Description== | |||
Heavy Containment Zone (HCZ) is one of four zones in [[Site-02]].<br> | |||
Placed below [[Light Containment Zone]] and located right next to [[Entrance Zone]], it is considered one of the most dangerous zones, as it is the spawn location for [[SCP-049]], [[SCP-079]], [[SCP-096]], [[SCP-106]], and [[SCP-939]]. | |||
Heavy Containment Zone | Heavy Containment Zone is also the only zone affected by the [[Overcharge]] event, which is used to re-contain SCP-079. This event occurs after all 3 [[Emergency Power Stations]] have been activated, and the button in SCP-079's Containment Chamber is pushed (this will also occur when SCP-079 is the last SCP alive). | ||
Heavy Containment Zone contains a few important rooms that contain items that can aid a player in escaping or re-containing certain SCP. | |||
{{Related|Soundtrack}} | {{Related|Soundtrack}} | ||
| Line 11: | Line 15: | ||
{{multi-listen item|filename=Doctors Lab.mp3|title=Heavy Containment Zone's Theme|description=}} | {{multi-listen item|filename=Doctors Lab.mp3|title=Heavy Containment Zone's Theme|description=}} | ||
{{multi-listen end}} | {{multi-listen end}} | ||
=Unique Areas= | =Unique Areas= | ||
Unique areas include containment chambers or other rooms of interest that spawn only once. These areas may include valuable items, weapons or have an important gameplay role. | Unique areas include containment chambers or other rooms of interest that spawn only once. These areas may include valuable items, weapons or have an important gameplay role. | ||
==Elevator Systems== | ==Elevator Systems== | ||
[[File: | [[File:HCZ Elevator A.png|400px|right|thumb|Elevator System A]] | ||
[[File: | [[File:HCZ Elevator_B.png|400px|right|thumb|Elevator System B]] | ||
[[File:Elevator | [[File:Elevator Lockdown.png|400px|right|thumb|Elevators after LCZ is locked down]] | ||
The '''Elevator Systems''' are two separate rooms | The '''Elevator Systems''' are two separate rooms that contain two elevators that connect Heavy Containment Zone to [[Light Containment Zone]]. | ||
Above each elevator is a timer showing how much time is left until Light Containment Zone gets [[Decontamination Process|Decontaminated]]. | |||
| Line 25: | Line 32: | ||
{{multi-listen item|filename=The Waiting Game.mp3|title=Elevator Music|description=}} | {{multi-listen item|filename=The Waiting Game.mp3|title=Elevator Music|description=}} | ||
{{multi-listen end}} | {{multi-listen end}} | ||
<br clear=all> | <br clear=all> | ||
== | ==Tesla Gate== | ||
[[File:{{#switch: {{CURRENTMONTHNAME}}| | [[File:{{#switch: {{CURRENTMONTHNAME}}|October = TeslaHalloween.png | TeslaIdle.gif }}|thumb|right|400px|The Tesla Gate]] | ||
[[File:TeslaFire.gif|thumb|right|400px|ZAP!]] | |||
[[File: | '''Tesla Gates''' are straight hallways equipped with high powered tesla coils. | ||
If the player enters a room with a tesla gate, it will activate its sensors and charge itself. Standing next to the tesla gate will cause it to fire a large amount of electricity. If a player is in the tesla coil when it is firing, it will shock and deal massive damage, instantly killing humans, SCP-106 and [[SCP-049-2]]. Tesla Gates only deal damage for three ticks, allowing most SCPs to not die in one blast.<br> | |||
Tesla Gates are quite loud and can be heard from several rooms away when operational. | |||
If SCP-079 viewing a room containing a tesla gate, the tesla coil will begin to charge itself even if no player is nearby. | |||
<br clear=all> | |||
==Server Room== | |||
[[File:Server_Room_top.png|400px|right|thumb|Top level]] | |||
[[File:Server_Room_Bottom.png|400px|right|thumb|Bottom level]] | |||
The '''Server Room''' is a two-level room full of servers. This room is mainly used for hiding. | |||
A Scientist Keycard can spawn either on the top or bottom floor behind the servers.<br> | |||
A [[Bulletproof Locker №7]], two [[First Aid Cabinet]]s, and two [[Emergency Power Stations]] can also spawn on the top floor. | |||
2 common hiding spots in this room include behind any of the servers or in a small area under the stairs. | |||
'''Guaranteed Spawns:''' | |||
* [[Keycard|Scientist Keycard]] | |||
[[ | |||
'''Possible Spawns:''' | |||
*On the top floor: | |||
** [[First Aid Cabinet]] (up to two) | |||
** [[Emergency Power Stations]] (up to two) | |||
** [[Bulletproof Locker №7]] | |||
** [[Workstation]] | |||
<br clear=all> | |||
==Alpha Warhead Silo== | |||
[[File:{{#switch: {{CURRENTMONTHNAME}}| December = Xmas Warhead_Elevator.png |Warhead Silo Elevator.png }}|400px|right|thumb|Elevator leading to the silo]] | |||
[[File:Alpha Warhead Silo.png|400px|right|thumb|Warhead silo]] | |||
[[File:WarheadArmory.png|400px|right|thumb|Armory]] | |||
[[File:Warhead Silo Panel.png|400px|right|thumb|Control panel]] | |||
The '''Alpha Warhead Silo''' is the location of the [[Alpha Warhead]]. It is located above HCZ, and can only be accessed via an elevator system. | |||
In the center of the area, is the silo itself, with the Alpha Warhead seated in place. <br> | |||
Opposite of the elevator system is a small control room, which contains a control panel. This panel is used to activate or deactivate the warhead. <br> | |||
The control room is covered by a wall with openings that face the elevator system. These openings make great cover when shooting enemies coming up the elevator. | |||
<br | Beside the control panel is an armory which does not require a Keycard to enter. <br> | ||
The armory will always contain a [[Workstation]], and either a [[MTF-E11-SR Rack]] or [[Weapon Locker Type 21]] as well. <br> | |||
Two [[Emergency Power Stations]] can spawn on the wall in this area.<br> | |||
[[ | |||
'''Guaranteed Spawns:''' | |||
*Shelves outside armory | |||
**[[Keycard|Zone Manager Keycard]] | |||
*In the armory: | |||
** [[MTF-E11-SR Rack]] or [[Weapon Locker Type 21]] | |||
'''Possible Spawns:''' | |||
*Outside the armory: | |||
** [[First Aid Cabinet]] | |||
** [[Emergency Power Stations|Emergency Power Station]] | |||
** [[Bulletproof Locker №7]] | |||
*Outside the control room: | |||
** [[First Aid Cabinet]] | |||
** [[Emergency Power Stations|Emergency Power Station]] | |||
<br clear=all> | <br clear=all> | ||
== | ==Ammunition Armory== | ||
[[File: | [[File:{{#switch: {{CURRENTMONTHNAME}}|October = Halloween HCZ_3Way Armory.png | December = Xmas HCZ_3Way Armory.png |Heavy Ammo Armory.png }}|400px|right|thumb|Entrance to the armory]] | ||
[[File: | [[File:HCZ Ammo_Inside.png|400px|right|thumb|Inside the armory]] | ||
The ''' | {{DoorStats| | ||
|ReqAccess=AA1 | |||
|AP = 50 | |||
|DestroyLvl=Lvl1 | |||
}} | |||
The '''Ammunition Armory''' is a T-shaped area which is connected with a three-way walkway. Falling off the walkway and into the pit will instantly kill the player. | |||
The armory itself requires {{Hoverimage|{{HoverKeycard|Required Access1=AA1}}|text=Armory Access 1}} to open. The armory includes a number of 9x19mm and 5.56x45mm ammo boxes and a [[Workstation]]. There is also a chance for a [[Bulletproof Locker №7]] to spawn inside the armory. | |||
The two outside walls of the armory are also possible spawn locations for [[Emergency Power Stations]]. | |||
''' | '''Guaranteed Spawns:''' | ||
* [[ | *Inside the armory | ||
* [[ | **[[COM-18]] | ||
**[[Flashlight]] | |||
**[[Radio]] | |||
**9x19mm Ammo (210 Rounds) | |||
**5.56x45mm Ammo (120 Rounds) | |||
'''Possible Spawns:''' | |||
*Inside the armory: | |||
** [[Bulletproof Locker №7]] | |||
** [[First Aid Cabinet]] | |||
*On the outside walls: | |||
* [[First Aid Cabinet]] (up to two) | |||
* [[Emergency Power Stations|Emergency Power Station]] (up to two) | |||
<br clear=all> | |||
==Micro H.I.D. Armory== | ==Micro H.I.D. Armory== | ||
[[File:{{#switch: {{CURRENTMONTHNAME}}|October = Halloween New Micro HID_Hallway.png| December = MicroHallwayXmas.jpg | | [[File:{{#switch: {{CURRENTMONTHNAME}}|October = Halloween New Micro HID_Hallway.png| December = MicroHallwayXmas.jpg |HCZ Micro HID Hallway.png }}|400px|right|thumb|Hallway]] | ||
[[File:Micro HID | [[File:Micro HID Side.png|400px|right|thumb|The door to the Micro H.I.D.]] | ||
[[File: | [[File:Micro HID Table.png|400px|right|thumb|Inside the armory]] | ||
{{DoorStats| | {{DoorStats| | ||
|ReqAccess=AA3 | |ReqAccess=AA3 | ||
| Line 132: | Line 142: | ||
|DestroyLvl=Lvl1 | |DestroyLvl=Lvl1 | ||
}} | }} | ||
The '''Micro H.I.D. Armory''' is a hallway that is separated into two sections by a wall and two doors | The '''Micro H.I.D. Armory''' is a hallway that is separated into two sections by a wall and two doors. This wall contains a breakable glass window. <br> | ||
Behind the two doors is a room containing multiple server racks, similar to the ones seen in the Server Room. This side room has a chance for a [[Bulletproof Locker №7]] to spawn in it | |||
Behind the two doors is a side room containing multiple server racks, similar to the ones seen in the Server Room. This side room has a chance for a [[Bulletproof Locker №7]] to spawn in it, and two [[Emergency Power Stations]] can spawn on the wall as well.<br> | |||
Emergency Power Stations | |||
In the middle of the side room is a armory that requires {{Hoverimage|{{HoverKeycard|Required Access1=AA3}}|text=Armory Access 3}} to open. The room contains the [[Micro H.I.D.]] and a [[Workstation]]. <br> | |||
'''Possible | '''Guaranteed Spawns:''' | ||
* [[Bulletproof Locker №7]] | *In the armory | ||
* [[ | ** [[Micro H.I.D.]] | ||
** [[Workstation]] | |||
'''Possible Spawns:''' | |||
*In the side room | |||
** [[Bulletproof Locker №7]] | |||
** [[First Aid Cabinet]] (up to two) | |||
** [[Emergency Power Stations|Emergency Power Station]] (up to two) | |||
<br clear=all> | |||
==SCP-939's Containment Area== | |||
[[File:{{#switch: {{CURRENTMONTHNAME}}|October = Halloween SCP_939_Top.png|939Entrance.png }}|400px|right|thumb|As seen from the entrance]] | |||
[[File:{{#switch: {{CURRENTMONTHNAME}}|October = Halloween SCP-939's Room Overview.png |939Overview.png }}|400px|right|thumb|Overview of the room]] | |||
[[File:939Side.png|400px|right|thumb|The stairs that lead to the bottom of the room]] | |||
[[File:939Spawn.png|400px|right|thumb|The bottom of the room where SCP-939 spawns]] | |||
'''SCP-939's Containment Area''' is a high area with a walkway on the left side. On the right side, behind a door, is a stairway that leads to the bottom of the chamber.<br> | |||
Falling off the walkway and into the containment chamber is fatal to human classes.<br> | |||
A [[Emergency Power Stations|Emergency Power Station]], [[Bulletproof Locker №7]], [[First Aid Cabinet]] or [[Workstation]] can also spawn on the walkway. | |||
Both [[SCP-939]] instances will spawn at the bottom of the stairs at the start of the round.<br> | |||
'''Possible Spawns:''' | |||
*On the walkway: | |||
** [[Bulletproof Locker №7]] | |||
** [[First Aid Cabinet]] | |||
** [[Workstation]] | |||
** [[Emergency Power Stations|Emergency Power Station]] | |||
<br clear=all> | <br clear=all> | ||
==SCP-049's Containment Area== | ==SCP-049's Containment Area== | ||
[[File: | [[File:049Hallway.png|400px|right|thumb|Hallway with elevator that leads to SCP-049's containment area]] | ||
[[File: | [[File:049OutsideChamber.png|400px|right|thumb|SCP-049's containment area]] | ||
[[File:049' | [[File:049Chamber.png|400px|right|thumb|SCP-049's chamber]] | ||
[[File:049Armory.png|400px|right|thumb|The armory]] | |||
<small>'''(Armory)'''</small><br> | <small>'''(Armory)'''</small><br> | ||
{{DoorStats| | {{DoorStats| | ||
| Line 159: | Line 193: | ||
|DestroyLvl=Lvl1 | |DestroyLvl=Lvl1 | ||
}} | }} | ||
'''SCP-049's Containment Area''' is a hallway that contains an elevator leading to the containment cell of [[SCP-049]] | '''SCP-049's Containment Area''' is a hallway that contains an elevator leading upwards to the containment cell of [[SCP-049]]. | ||
When a player travels up the elevator into SCP-049's Containment Area, two doors and some shelves can be seen. The bigger gate door is the door that leads SCP-049's empty containment chamber, while the normal door leads to a armory, which requires {{Hoverimage|{{HoverKeycard|Required Access1=AA2}}|text=Armory Access 2}} to open. A [[Bulletproof Locker №7]] can also spawn outside the armory. | |||
The armory contains a [[Workstation]] on the right wall of the room. The left wall of the room will either contain a [[MTF-E11-SR Rack]] | The armory contains a [[Workstation]] on the right wall of the room. The left wall of the room will either contain a [[MTF-E11-SR Rack]] or a [[Weapon Locker Type 21]].<br> | ||
A [[Emergency Power Stations|Emergency Power Station]] can also spawn on the wall of the hallway. | |||
[[SCP-049]] will spawn inside his containment chamber at the start of the round. | |||
'''Possible | '''Guaranteed Spawns:''' | ||
*Shelves in the back of the room | |||
**[[Keycard|Zone Manager Keycard]] | |||
*In the armory: | |||
** [[MTF-E11-SR Rack]] or [[Weapon Locker Type 21]] | |||
'''Possible Spawns:''' | |||
*Hallway: | *Hallway: | ||
** [[ | ** [[First Aid Cabinet]] | ||
** [[Emergency Power Stations|Emergency Power Station]] | |||
*Outside the armory: | |||
** [[Bulletproof Locker №7]] | |||
<br clear=all> | |||
==SCP-096's Containment Area== | |||
[[File:{{#switch: {{CURRENTMONTHNAME}}|October = 096Halloween.png | December = Xmas 096's CC_Door2.png |096Entrance.png }}|400px|right|thumb|Entrance to SCP-096's chamber]] | |||
[[File:096Keycard.png|400px|right|thumb|The dead Facility Guard found in the room]] | |||
{{DoorStats| | |||
|ReqAccess=CC2 | |||
|AP = 40 | |||
|DestroyLvl=Lvl1 | |||
}} | |||
'''SCP-096's Containment Area''' is a small room that contains [[SCP-096]]'s containment chamber. | |||
The room outside SCP-096's chamber contains a control panel that can't be interacted with. This smaller room has a chance for a [[Emergency Power Stations|Emergency Power Station]] to spawn on the right wall in the room. There is also a chance that an [[Bulletproof Locker №7]] spawns beside the control panel. | |||
The containment chamber's door requires a keycard with {{Hoverimage|{{HoverKeycard|Required Access1=CC2}}|text=Containment Access 2}} to open. The chamber itself is a red-lit room, filled with movement sensors to keep track of SCP-096 when it's inside. <br> | |||
An MTF Sergeant Keycard and dead guard's body can be found on the floor in this chamber. | |||
[[SCP-096]] will spawn outside its containment chamber at the start of the round. | |||
'''Guaranteed Spawns:''' | |||
* | *Inside the containment chamber: | ||
** [[Keycard|MTF Sergeant Keycard]] | |||
'''Possible Spawns:''' | |||
*Outside the contianment Chamber: | |||
* [[Bulletproof Locker №7]] | |||
* [[First Aid Cabinet]] | |||
* [[Workstation]] | |||
* [[Emergency Power Stations|Emergency Power Station]] | |||
<br clear=all> | <br clear=all> | ||
==SCP-079's Containment Area== | ==SCP-079's Containment Area== | ||
[[File: | [[File:079Entrance.png|400px|right|thumb|Entrance to SCP-079's containment area]] | ||
[[File:{{#switch: {{CURRENTMONTHNAME}}|October = Halloween 079's CC Main Room 2.png | December = Xmas 079's CC Main Room 2.png | | [[File:{{#switch: {{CURRENTMONTHNAME}}|October = Halloween 079's CC Main Room 2.png | December = Xmas 079's CC Main Room 2.png |079Chamber.png }}|400px|right|thumb|SCP-079's containment area and cage]] | ||
[[File: | [[File:079Armory.png|400px|right|thumb|The Side Room in SCP-079's containment area]] | ||
[[File:ARG_PlaqueV2.png| | [[File:ARG_PlaqueV2.png|400px|right|thumb|A plaque with the names of the main people who participated in the ARG]] | ||
{{DoorStats| | {{DoorStats|Override= | ||
|ReqAccess= | Locked until all three Emergency Power Stations are activated<br>Containment Access Tier 2 | ||
|ReqAccess = CC2 | |||
|AP = 110 | |AP = 110 | ||
|DestroyLvl=Lvl3 | |DestroyLvl=Lvl3 | ||
}} | }} | ||
The entrance of '''SCP-079's Containment Area''' is a small stairway which leads to the two gates outside [[SCP-079|SCP-079's]] chamber | The entrance of '''SCP-079's Containment Area''' is a small stairway which leads to the two gates outside [[SCP-079|SCP-079's]] chamber. | ||
At the start of the round, both gates will be locked shut and cannot be opened until all 3 [[Emergency Power Stations]] have been activated. Once all 3 have been activated, the gates will be forced open. | |||
There is also a side room | Behind the gates is a medium sized room that contains SCP-079 behind a cage. <br> | ||
A plaque can be found in SCP-079's room for the ARG event held in December of 2019. The plaque has a list of the main people who participated in the event. <br> | There is also a side room that contains lots of loot and a button to terminate SCP-079. Pressing the button will cause the [[Overcharge]] event to occur, and will allow the gates to be open/closed with any keycard with Containment Tier 2. Near the upper right of the button, one of the four hidden Hubertballs can be found. It is nearly impossible to see without noclip. | ||
A plaque can also be found in SCP-079's room for the ARG event held in December of 2019. The plaque has a list of the main people who participated in the event. <br> | |||
Scanning the QR code on the plaque leads to the [https://i.imgur.com/BE4HKAk.jpg| following link] | Scanning the QR code on the plaque leads to the [https://i.imgur.com/BE4HKAk.jpg| following link] | ||
The area outside the gates contains two possible spawn locations for [[Emergency Power Stations]]. | |||
'''Guaranteed Spawns:''' | |||
[[ | *In the armory: | ||
[[ | **Firearms: | ||
*** [[Crossvec]] | |||
**Grenades: | |||
*** 3 [[Flashbang Grenade]]s | |||
*** 4 [[High-Explosive Grenade]]s | |||
**Ammo: | |||
*** 9x19mm (105 Rounds) | |||
**Body armors: | |||
*** 3 [[Heavy Armor]]s | |||
**Medical Items: | |||
*** 3 [[First Aid Kit]]s | |||
*** 2 [[Adrenaline]]s | |||
**Other: | |||
* [[ | *** 2 [[Radio]]s | ||
* [[ | *** 2 [[Flashlight]]s | ||
* [[ | *** 2 [[MTF-E11-SR Rack]]s | ||
*** 2 [[Coin]]s (Hidden on top of an MTF-E11-SR Rack) | |||
*** [[Workstation]] | |||
'''Possible Spawns:''' | |||
*Outside the containment chamber | |||
** [[First Aid Cabinet]] (up to two) | |||
** [[Emergency Power Stations|Emergency Power Station]] (up to two) | |||
<br clear=all> | <br clear=all> | ||
==SCP-106's Containment Area== | ==SCP-106's Containment Area== | ||
[[File: | [[File:106Entrance.png|400px|right|thumb|SCP-106's containment area]] | ||
[[File: | [[File:106Door.png|400px|right|thumb|SCP-106's containment door that auto closes]] | ||
[[File: | [[File:106FemurBreaker.png|400px|right|thumb|Femur Breaker room]] | ||
[[File: | [[File:106Stairs.png|400px|right|thumb|The lower level of SCP-106's containment area]] | ||
[[File: | [[File:106Bottom.png|400px|right|thumb|The bottom SCP-106's containment area, where SCP-106 spawns]] | ||
{{DoorStats| | {{DoorStats| | ||
|ReqAccess=CC3 | |ReqAccess=CC3 | ||
| Line 254: | Line 312: | ||
To the right of the entrance is SCP-106's containment chamber. The chamber floats above the ground, held in place by powerful electromagnets. The chamber can be jumped to from the entrance platform, but missing the jump and falling is fatal. The top of the chamber can act as a hiding place or to avoid some SCPs. | To the right of the entrance is SCP-106's containment chamber. The chamber floats above the ground, held in place by powerful electromagnets. The chamber can be jumped to from the entrance platform, but missing the jump and falling is fatal. The top of the chamber can act as a hiding place or to avoid some SCPs. | ||
The main doors require a keycard with {{Hoverimage|{{HoverKeycard|Required Access1=CC3}}|text=Containment Access 3}} to open. Both lead the | The main doors require a keycard with {{Hoverimage|{{HoverKeycard|Required Access1=CC3}}|text=Containment Access 3}} to open. Both doors will lead to the main control area in SCP-106's chamber. <br> | ||
Both doors function on a time lock similar to checkpoints and will automatically close after 10 seconds. | |||
The Femur Breaker is a small room that allows a single person to sacrifice themselves and re-contain SCP-106. Once a human goes inside the Femur Breaker they are instantly killed and the door is closed behind them. Another human is also required to push | Inside the control room is a shelf, several control panels, a button, and the Femur Breaker. <br> | ||
The Femur Breaker is a small room that allows a single person to sacrifice themselves and re-contain SCP-106. Once a human goes inside the Femur Breaker, they are instantly killed and the door is closed behind them. Another human is also required to push a button in the control room. Once the button is pushed, an audio cue will start to play and soon after, SCP-106 will be re-contained. | |||
An [[Emergency Power Stations|Emergency Power Station]] can spawn near the entrance of the room. | |||
[[SCP-106]] will spawn at the bottom of his containment chamber at the start of the round. | |||
'''Guaranteed Spawns:''' | |||
*On the shelf next to the Femur Breaker: | |||
** [[Coin]] | |||
'''Possible | '''Possible Spawns:''' | ||
* [[ | *Outside the control room: | ||
* [[ | ** [[First Aid Cabinet]] | ||
** [[Emergency Power Stations|Emergency Power Station]] | |||
<br clear=all> | <br clear=all> | ||
==Entrance Zone Checkpoint== | ==Entrance Zone Checkpoint== | ||
[[File: | [[File:HCZEZ Checkpoint.png|400px|right|thumb|Checkpoint]] | ||
{{DoorStats| | {{DoorStats| | ||
|ReqAccess=CA | |ReqAccess=CA | ||
| Line 286: | Line 340: | ||
|DestroyLvl=RA | |DestroyLvl=RA | ||
}} | }} | ||
The '''Entrance Zone Checkpoint''' is a | The '''Entrance Zone Checkpoint''' is a checkpoint that connects Heavy Containment Zone to [[Entrance Zone]].<br> | ||
A keycard with {{Hoverimage|{{HoverKeycard|Required Access1=CA}}|text=Checkpoint Access}} is required to open the checkpoint. After 10 seconds, the checkpoint doors will close. | |||
A keycard with {{Hoverimage|{{HoverKeycard|Required Access1=CA}}|text=Checkpoint Access}} is required to open the checkpoint. | |||
Two [[Emergency Power Stations]] can spawn on the HCZ side of the checkpoint. <br> | |||
'''Possible Spawns:''' | |||
* [[First Aid Cabinet]] (up to two) | |||
* [[Emergency Power Stations|Emergency Power Station]] (up to two) | |||
<br clear=all> | <br clear=all> | ||
| Line 296: | Line 355: | ||
<br clear=all> | <br clear=all> | ||
==Straight Hallway== | ==Straight Hallway== | ||
[[File: | [[File:HCZStraight.png|400px|right|thumb|Straight hallway]] | ||
A simple straight hallway. | A simple straight hallway. | ||
<br clear=all> | <br clear=all> | ||
==Corner Hallway== | ==Corner Hallway== | ||
[[File: | [[File:HCZCorner.png|400px|right|thumb|Corner hallway]] | ||
A simple Corner hallway. | A simple Corner hallway. | ||
<br clear=all> | <br clear=all> | ||
==3-Way Intersection== | ==3-Way Intersection== | ||
[[File: | [[File:HCZ3Way.png|400px|right|thumb|T shaped hallway]] | ||
A simple three way intersection. | [[File:HCZ3WayStation.png|400px|right|thumb|T shaped hallway with Workstation]] | ||
A simple three way intersection. | |||
'''Possible Spawns:''' | |||
*[[Workstation]] | |||
<br clear=all> | <br clear=all> | ||
==4-Way Intersection== | ==4-Way Intersection== | ||
[[File: | [[File:HeavyCAT.png|400px|right|thumb|X shaped hallway]] | ||
A simple four way intersection. | A simple four way intersection. | ||
<br clear=all> | <br clear=all> | ||
=Map Layouts= | =Map Layouts= | ||
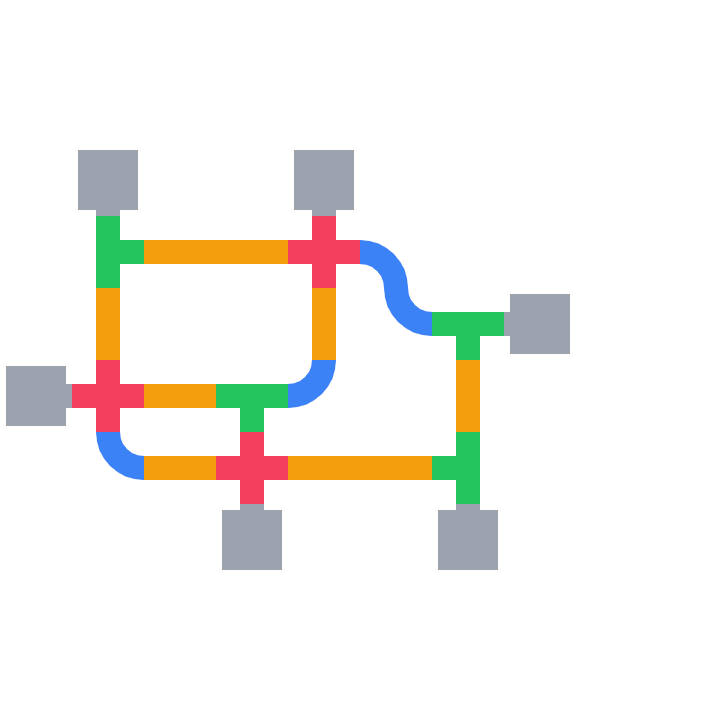
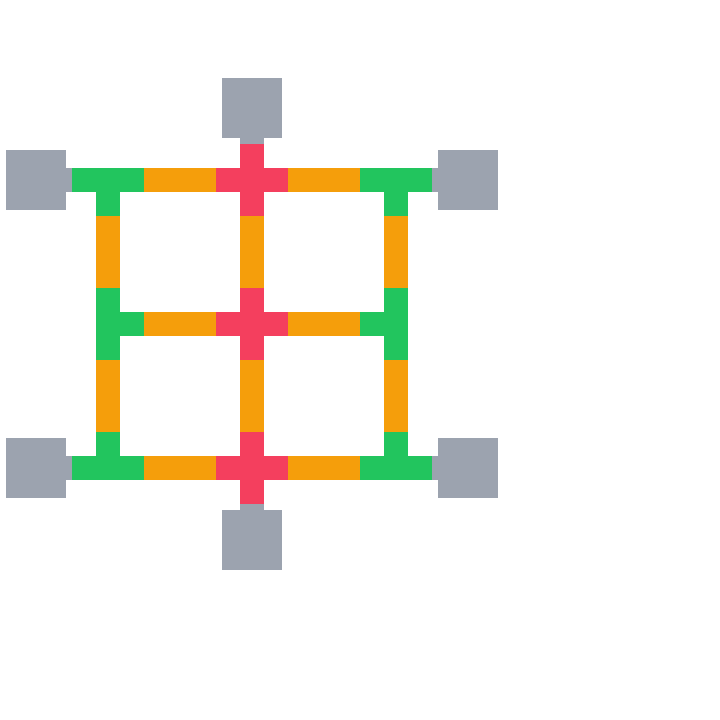
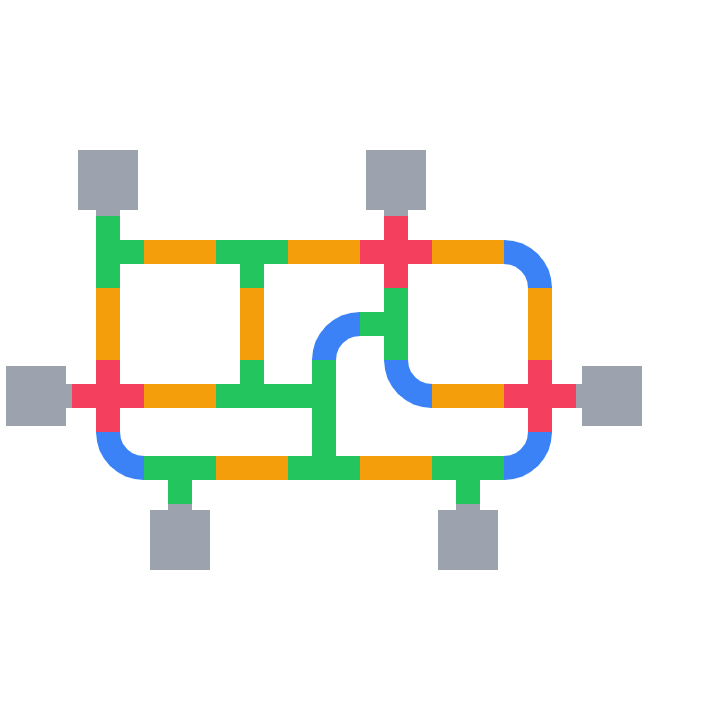
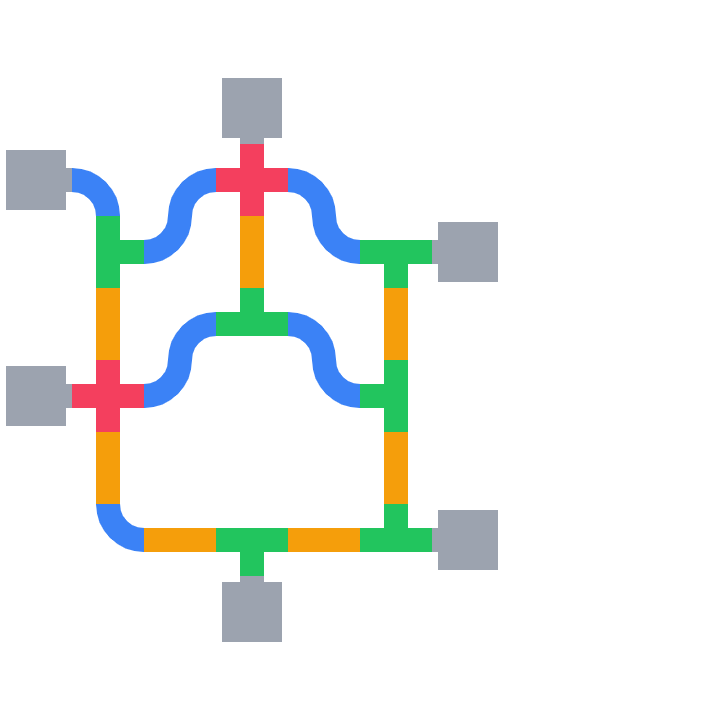
There are five possible map layouts of Heavy Containment Zone. Special Rooms are randomized in these layouts.<br> | There are five possible map layouts of Heavy Containment Zone. Special Rooms are randomized in these layouts.<br> | ||
Below are all the possible map layouts | Below are all the possible map layouts.<br> | ||
Credit: | |||
*Mooshua - [https://layout.mooshua.net/ SL Layout Creator]. This website is not official. | |||
<div class="round-tabber"> | |||
<tabber> | <tabber> | ||
Tetris= | |||
<center> | <center> | ||
[[File:Layout HCZ Tetris.png]] | |||
|-| | |-| | ||
Hyperhube= | |||
<center> | <center> | ||
[[File:Layout HCZ Hyperhube.png]] | |||
|-| | |-| | ||
Squares= | |||
<center> | <center> | ||
[[File:Layout HCZ Squares.png]] | |||
|-| | |-| | ||
Circuit= | |||
<center> | <center> | ||
[[File:Layout HCZ Circuit.png]] | |||
|-| | |-| | ||
Golem= | |||
<center> | <center> | ||
[[File:Layout HCZ Golem.png]] | |||
</tabber> | </tabber> | ||
=Trivia= | =Trivia= | ||
* | *Multiple doors in HCZ are noticeably uncentered or too large for their frame. Have fun knowing this forever. | ||
*In the game's code, the type of killbox the in Ammunition Armory's pit is called "Checkpoint Killer", as the killbox was originally made to prevent players from abusing an out of bounds expolit at checkpoints. | |||
**The same killbox is used by the [[Surface_Zone#Chaos Insurgency Spawn|Chaos Car]]. | |||
[[Category:Zones]] | [[Category:Zones]] | ||
{{Locations Navbox}} | {{Locations Navbox}} | ||
Revision as of 18:37, 13 October 2022

|
Anyalsis Complete. Writting up new report ATTENTION! This is a wiki for the main branch of SCP SL! If you are looking for changes for the Beta, check out our Beta Wiki found here |
The Heavy Containment Zone is one of four zones found in SCP: Secret Laboratory. It is the location of the Micro H.I.D., as well as the three Emergency Power Stations.
Contents
- 1 Description
- 2 Unique Areas
- 2.1 Elevator Systems
- 2.2 Tesla Gate
- 2.3 Server Room
- 2.4 Alpha Warhead Silo
- 2.5 Ammunition Armory
- 2.6 Micro H.I.D. Armory
- 2.7 SCP-939's Containment Area
- 2.8 SCP-049's Containment Area
- 2.9 SCP-096's Containment Area
- 2.10 SCP-079's Containment Area
- 2.11 SCP-106's Containment Area
- 2.12 Entrance Zone Checkpoint
- 3 Hallways
- 4 Map Layouts
- 5 Trivia
Description
Heavy Containment Zone (HCZ) is one of four zones in Site-02.
Placed below Light Containment Zone and located right next to Entrance Zone, it is considered one of the most dangerous zones, as it is the spawn location for SCP-049, SCP-079, SCP-096, SCP-106, and SCP-939.
Heavy Containment Zone is also the only zone affected by the Overcharge event, which is used to re-contain SCP-079. This event occurs after all 3 Emergency Power Stations have been activated, and the button in SCP-079's Containment Chamber is pushed (this will also occur when SCP-079 is the last SCP alive).
Heavy Containment Zone contains a few important rooms that contain items that can aid a player in escaping or re-containing certain SCP.
Related article: Soundtrack
Unique Areas
Unique areas include containment chambers or other rooms of interest that spawn only once. These areas may include valuable items, weapons or have an important gameplay role.
Elevator Systems
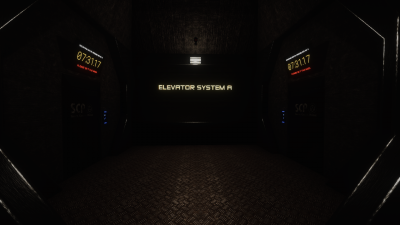
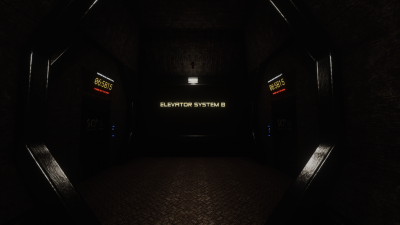
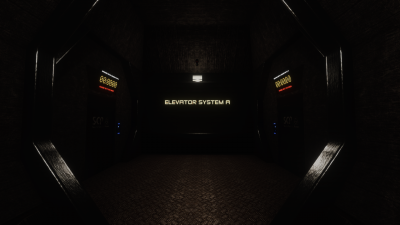
The Elevator Systems are two separate rooms that contain two elevators that connect Heavy Containment Zone to Light Containment Zone.
Above each elevator is a timer showing how much time is left until Light Containment Zone gets Decontaminated.
Related article: Soundtrack
Tesla Gate
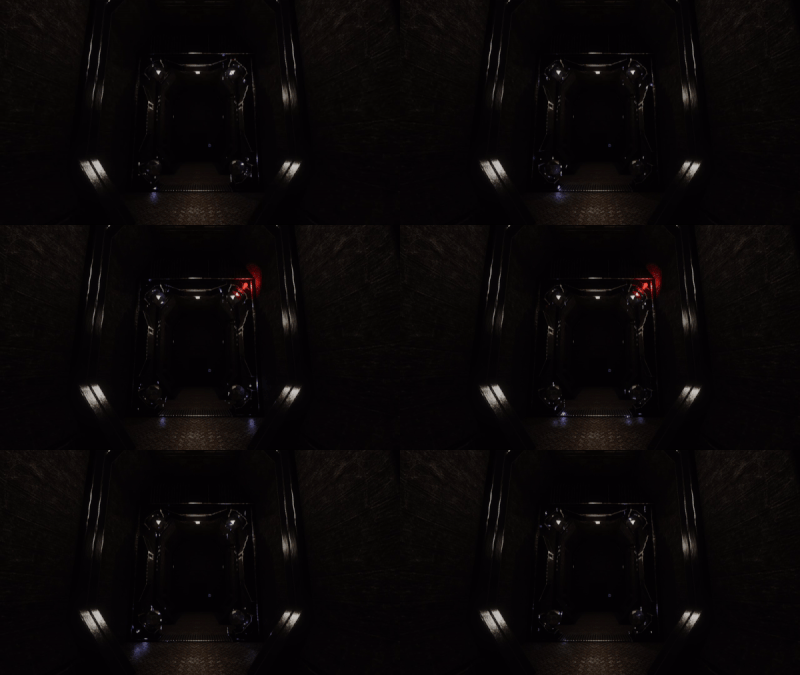
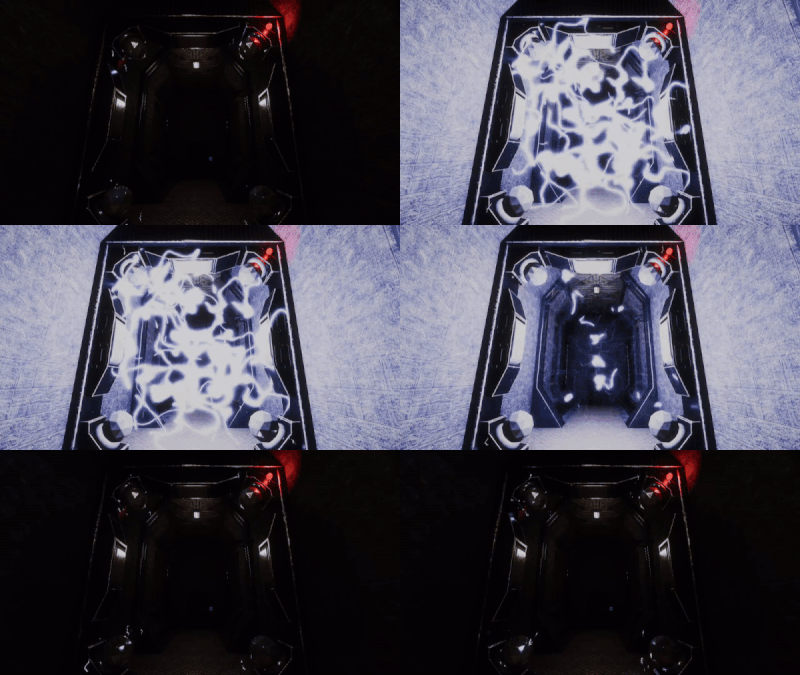
Tesla Gates are straight hallways equipped with high powered tesla coils.
If the player enters a room with a tesla gate, it will activate its sensors and charge itself. Standing next to the tesla gate will cause it to fire a large amount of electricity. If a player is in the tesla coil when it is firing, it will shock and deal massive damage, instantly killing humans, SCP-106 and SCP-049-2. Tesla Gates only deal damage for three ticks, allowing most SCPs to not die in one blast.
Tesla Gates are quite loud and can be heard from several rooms away when operational.
If SCP-079 viewing a room containing a tesla gate, the tesla coil will begin to charge itself even if no player is nearby.
Server Room
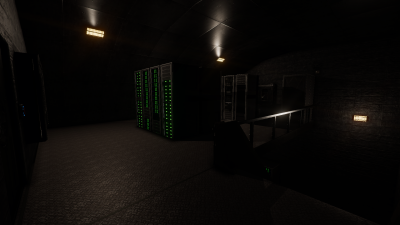
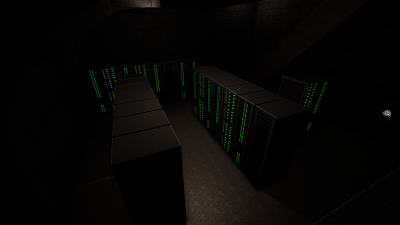
The Server Room is a two-level room full of servers. This room is mainly used for hiding.
A Scientist Keycard can spawn either on the top or bottom floor behind the servers.
A Bulletproof Locker №7, two First Aid Cabinets, and two Emergency Power Stations can also spawn on the top floor.
2 common hiding spots in this room include behind any of the servers or in a small area under the stairs.
Guaranteed Spawns:
Possible Spawns:
- On the top floor:
- First Aid Cabinet (up to two)
- Emergency Power Stations (up to two)
- Bulletproof Locker №7
- Workstation
Alpha Warhead Silo
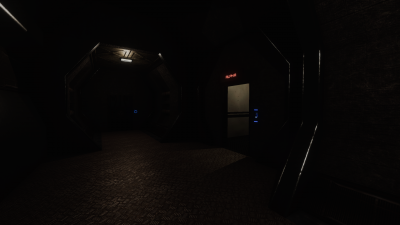
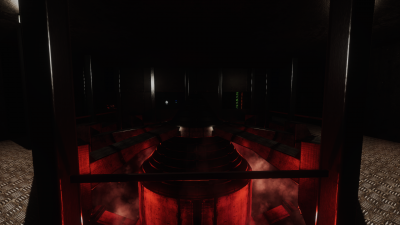
The Alpha Warhead Silo is the location of the Alpha Warhead. It is located above HCZ, and can only be accessed via an elevator system.
In the center of the area, is the silo itself, with the Alpha Warhead seated in place.
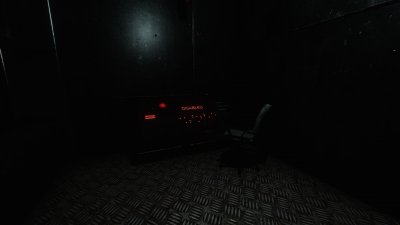
Opposite of the elevator system is a small control room, which contains a control panel. This panel is used to activate or deactivate the warhead.
The control room is covered by a wall with openings that face the elevator system. These openings make great cover when shooting enemies coming up the elevator.
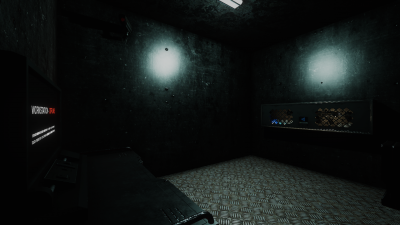
Beside the control panel is an armory which does not require a Keycard to enter.
The armory will always contain a Workstation, and either a MTF-E11-SR Rack or Weapon Locker Type 21 as well.
Two Emergency Power Stations can spawn on the wall in this area.
Guaranteed Spawns:
- Shelves outside armory
- In the armory:
Possible Spawns:
- Outside the armory:
- Outside the control room:
Ammunition Armory
| Armory Access Tier 1 Required | |
| SCP-079 AP Cost: 50 AP | |
| Door can be destroyed with explosives, SCP-018 and SCP-096 |
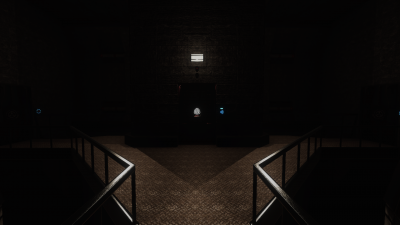
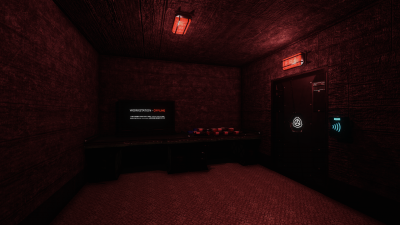
The Ammunition Armory is a T-shaped area which is connected with a three-way walkway. Falling off the walkway and into the pit will instantly kill the player.
The armory itself requires
Armory Access 1 Armory Access 1to open. The armory includes a number of 9x19mm and 5.56x45mm ammo boxes and a Workstation. There is also a chance for a Bulletproof Locker №7 to spawn inside the armory.
The two outside walls of the armory are also possible spawn locations for Emergency Power Stations.
Guaranteed Spawns:
- Inside the armory
- COM-18
- Flashlight
- Radio
- 9x19mm Ammo (210 Rounds)
- 5.56x45mm Ammo (120 Rounds)
Possible Spawns:
- Inside the armory:
- On the outside walls:
- First Aid Cabinet (up to two)
- Emergency Power Station (up to two)
Micro H.I.D. Armory
| Armory Access Tier 3 Required | |
| SCP-079 AP Cost: 70 AP | |
| Door can be destroyed with explosives, SCP-018 and SCP-096 |
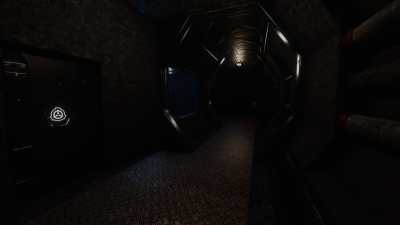
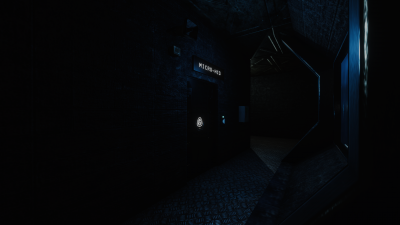
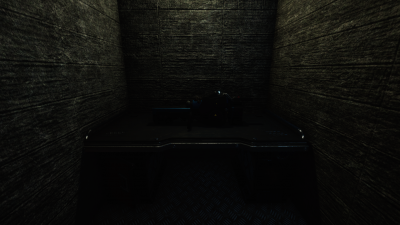
The Micro H.I.D. Armory is a hallway that is separated into two sections by a wall and two doors. This wall contains a breakable glass window.
Behind the two doors is a side room containing multiple server racks, similar to the ones seen in the Server Room. This side room has a chance for a Bulletproof Locker №7 to spawn in it, and two Emergency Power Stations can spawn on the wall as well.
to open. The room contains the Micro H.I.D. and a Workstation.
Guaranteed Spawns:
- In the armory
Possible Spawns:
- In the side room
- Bulletproof Locker №7
- First Aid Cabinet (up to two)
- Emergency Power Station (up to two)
SCP-939's Containment Area
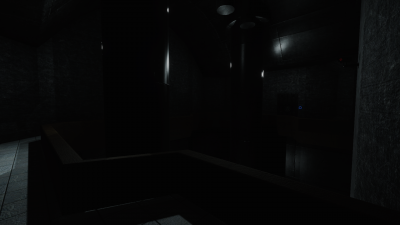
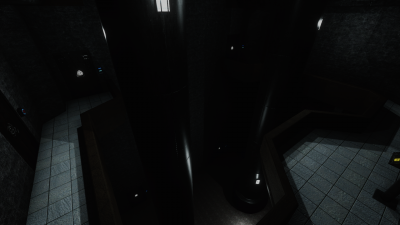
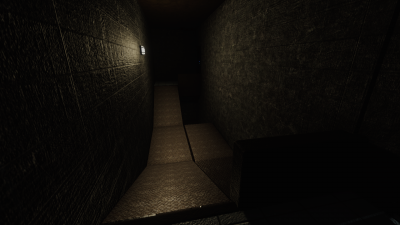
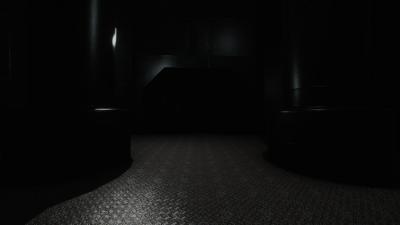
SCP-939's Containment Area is a high area with a walkway on the left side. On the right side, behind a door, is a stairway that leads to the bottom of the chamber.
Falling off the walkway and into the containment chamber is fatal to human classes.
A Emergency Power Station, Bulletproof Locker №7, First Aid Cabinet or Workstation can also spawn on the walkway.
Both SCP-939 instances will spawn at the bottom of the stairs at the start of the round.
Possible Spawns:
- On the walkway:
SCP-049's Containment Area
(Armory)
| Armory Access Tier 2 Required | |
| SCP-079 AP Cost: 60 AP | |
| Door can be destroyed with explosives, SCP-018 and SCP-096 |
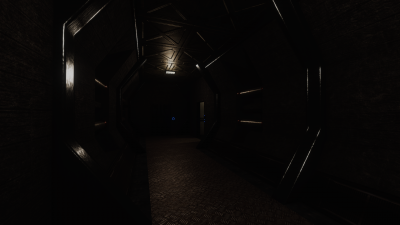
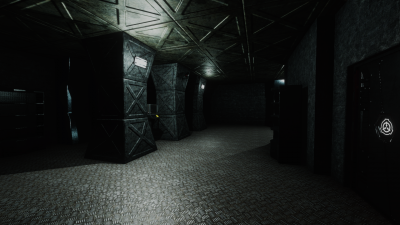
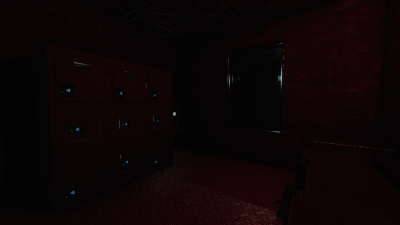
SCP-049's Containment Area is a hallway that contains an elevator leading upwards to the containment cell of SCP-049.
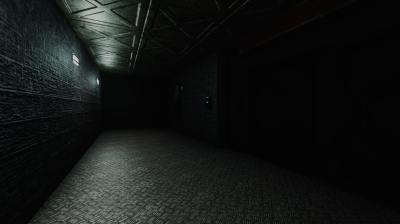
When a player travels up the elevator into SCP-049's Containment Area, two doors and some shelves can be seen. The bigger gate door is the door that leads SCP-049's empty containment chamber, while the normal door leads to a armory, which requires Armory Access 2 Armory Access 2to open. A Bulletproof Locker №7 can also spawn outside the armory.
The armory contains a Workstation on the right wall of the room. The left wall of the room will either contain a MTF-E11-SR Rack or a Weapon Locker Type 21.
A Emergency Power Station can also spawn on the wall of the hallway.
SCP-049 will spawn inside his containment chamber at the start of the round.
Guaranteed Spawns:
- Shelves in the back of the room
- In the armory:
Possible Spawns:
- Hallway:
- Outside the armory:
SCP-096's Containment Area
| Containment Access Tier 2 Required | |
| SCP-079 AP Cost: 40 AP | |
| Door can be destroyed with explosives, SCP-018 and SCP-096 |
SCP-096's Containment Area is a small room that contains SCP-096's containment chamber.
The room outside SCP-096's chamber contains a control panel that can't be interacted with. This smaller room has a chance for a Emergency Power Station to spawn on the right wall in the room. There is also a chance that an Bulletproof Locker №7 spawns beside the control panel.
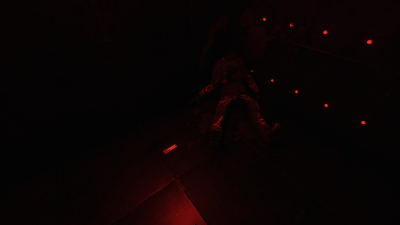
The containment chamber's door requires a keycard with Containment Access 2 Containment Access 2 to open. The chamber itself is a red-lit room, filled with movement sensors to keep track of SCP-096 when it's inside.
An MTF Sergeant Keycard and dead guard's body can be found on the floor in this chamber.
SCP-096 will spawn outside its containment chamber at the start of the round.
Guaranteed Spawns:
- Inside the containment chamber:
Possible Spawns:
- Outside the contianment Chamber:
- Bulletproof Locker №7
- First Aid Cabinet
- Workstation
- Emergency Power Station
SCP-079's Containment Area
| Containment Access Tier 2 Required | |
| SCP-079 AP Cost: 110 AP | |
| Door can't be destroyed by any means |
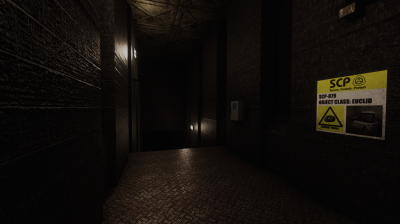
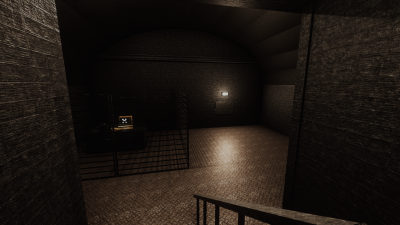
The entrance of SCP-079's Containment Area is a small stairway which leads to the two gates outside SCP-079's chamber.
At the start of the round, both gates will be locked shut and cannot be opened until all 3 Emergency Power Stations have been activated. Once all 3 have been activated, the gates will be forced open.
Behind the gates is a medium sized room that contains SCP-079 behind a cage.
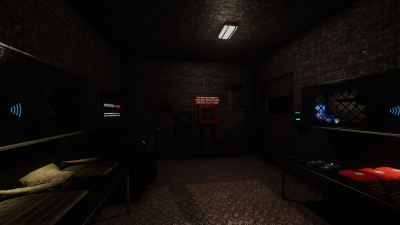
There is also a side room that contains lots of loot and a button to terminate SCP-079. Pressing the button will cause the Overcharge event to occur, and will allow the gates to be open/closed with any keycard with Containment Tier 2. Near the upper right of the button, one of the four hidden Hubertballs can be found. It is nearly impossible to see without noclip.
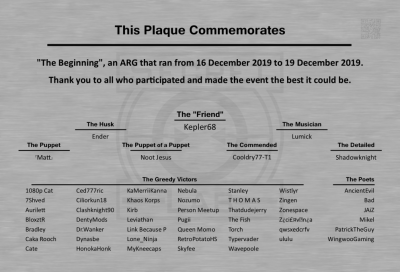
A plaque can also be found in SCP-079's room for the ARG event held in December of 2019. The plaque has a list of the main people who participated in the event.
Scanning the QR code on the plaque leads to the following link
The area outside the gates contains two possible spawn locations for Emergency Power Stations.
Guaranteed Spawns:
- In the armory:
- Firearms:
- Grenades:
- Ammo:
- 9x19mm (105 Rounds)
- Body armors:
- Medical Items:
- Other:
- 2 Radios
- 2 Flashlights
- 2 MTF-E11-SR Racks
- 2 Coins (Hidden on top of an MTF-E11-SR Rack)
- Workstation
Possible Spawns:
- Outside the containment chamber
- First Aid Cabinet (up to two)
- Emergency Power Station (up to two)
SCP-106's Containment Area
| Containment Access Tier 3 Required | |
| SCP-079 AP Cost: 110 AP | |
| The door can be destoryed by SCP-096 |
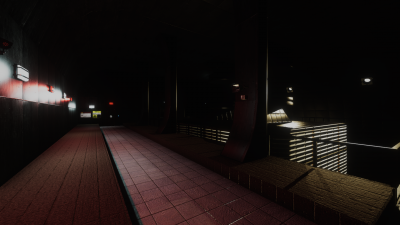
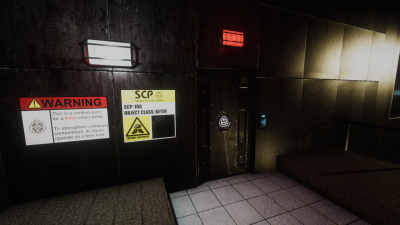
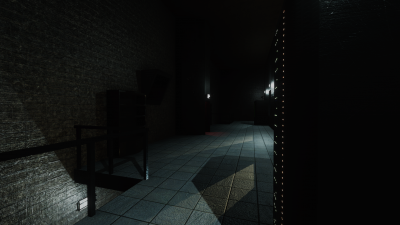
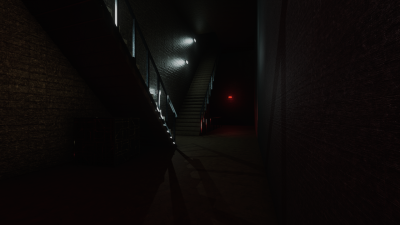
SCP-106's Containment Area is a massive room that contains the chamber of SCP-106. This room is a even darker compared to the rest of the HCZ.
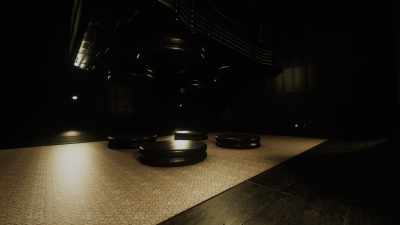
To the right of the entrance is SCP-106's containment chamber. The chamber floats above the ground, held in place by powerful electromagnets. The chamber can be jumped to from the entrance platform, but missing the jump and falling is fatal. The top of the chamber can act as a hiding place or to avoid some SCPs.
The main doors require a keycard with Containment Access 3 CC3 doesn't exist anymore you idiot!!!! to open. Both doors will lead to the main control area in SCP-106's chamber.
Both doors function on a time lock similar to checkpoints and will automatically close after 10 seconds.
Inside the control room is a shelf, several control panels, a button, and the Femur Breaker.
The Femur Breaker is a small room that allows a single person to sacrifice themselves and re-contain SCP-106. Once a human goes inside the Femur Breaker, they are instantly killed and the door is closed behind them. Another human is also required to push a button in the control room. Once the button is pushed, an audio cue will start to play and soon after, SCP-106 will be re-contained.
An Emergency Power Station can spawn near the entrance of the room.
SCP-106 will spawn at the bottom of his containment chamber at the start of the round.
Guaranteed Spawns:
- On the shelf next to the Femur Breaker:
Possible Spawns:
- Outside the control room:
Entrance Zone Checkpoint
| Checkpoint Access Required | |
| SCP-079 AP Cost: 10 AP | |
| Door can only be destroyed with Remote Admin |
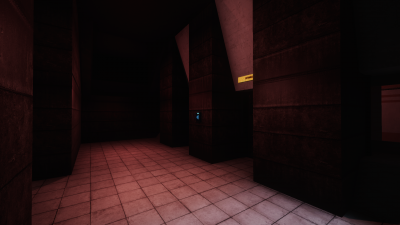
The Entrance Zone Checkpoint is a checkpoint that connects Heavy Containment Zone to Entrance Zone.
is required to open the checkpoint. After 10 seconds, the checkpoint doors will close.
Two Emergency Power Stations can spawn on the HCZ side of the checkpoint.
Possible Spawns:
- First Aid Cabinet (up to two)
- Emergency Power Station (up to two)
Hallways
Hallways are repeating connectors in between unique areas and other hallways. Most of the time nothing of interest can be found in them.
Straight Hallway
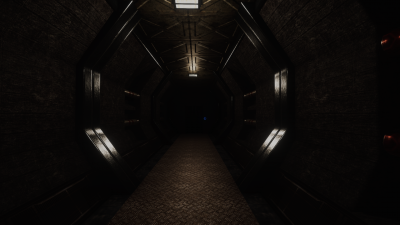
A simple straight hallway.
Corner Hallway
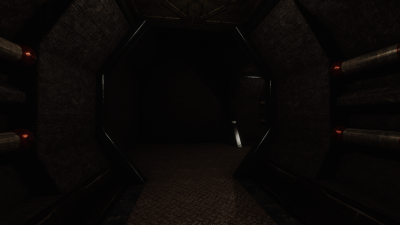
A simple Corner hallway.
3-Way Intersection
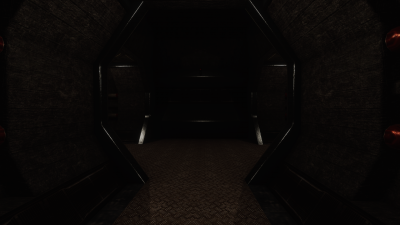
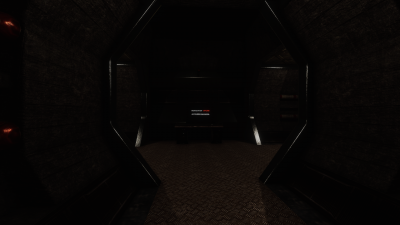
A simple three way intersection.
Possible Spawns:
4-Way Intersection
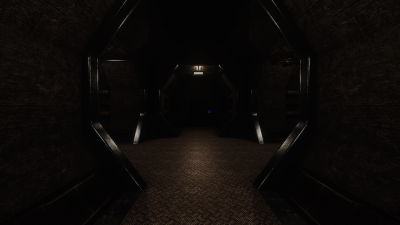
A simple four way intersection.
Map Layouts
There are five possible map layouts of Heavy Containment Zone. Special Rooms are randomized in these layouts.
Below are all the possible map layouts.
Credit:
- Mooshua - SL Layout Creator. This website is not official.
Trivia
- Multiple doors in HCZ are noticeably uncentered or too large for their frame. Have fun knowing this forever.
- In the game's code, the type of killbox the in Ammunition Armory's pit is called "Checkpoint Killer", as the killbox was originally made to prevent players from abusing an out of bounds expolit at checkpoints.
- The same killbox is used by the Chaos Car.
| ||||||||||||||||||||||
- This page was last edited on 13 October 2022, at 18:37.
- Content is available under CC BY-SA 3.0 unless otherwise noted.
- Privacy policy
- About SCP: Secret Laboratory English Official Wiki
- Disclaimers


